There’s something about the festive crunch of peppermint paired with creamy layers that makes the Candy Cane No-Bake Dessert Recipe an absolute holiday favorite in my kitchen. Easy, dreamy, and bursting with flavor—it’s the perfect sweet treat to whip up without turning on the oven.

Jump to:
Why You'll Love This Recipe
I adore this recipe because it captures that nostalgic holiday vibe without any fuss. You don’t have to be a dessert pro to nail it, and the peppermint twist always feels like a seasonal hug. Plus, it’s a crowd-pleaser every single time.
- No oven necessary: Skip the heat and fuss; this dessert comes together quickly and chills into perfection.
- Festively refreshing flavors: Peppermint and white chocolate combine for a light yet rich taste experience.
- Layered texture magic: Crunchy cookie base meets creamy filling and fluffy whipped topping for a delightful contrast.
- Super versatile: Feel free to tweak the peppermint amount or try different cookie bases to make it your own.
Ingredients & Why They Work
Each component plays a crucial role here — from the sturdy Oreo crust that gives you a satisfying crunchy base, to the creamy peppermint-infused layers that melt in your mouth. Gather these ingredients thoughtfully for the best results.

- Oreo cookies: They provide a chocolaty, sturdy crust that balances the sweetness of the layers above.
- Unsalted butter: Helps bind the cookie crumbs into that perfect crust consistency.
- Cream cheese: Adds a rich tang and smoothness that elevates the filling.
- Powdered sugar: Sweetens the cream cheese mixture without graininess.
- Milk: Lightens and blends the filling to a silky texture.
- Whipped topping: Keeps things fluffy and light, creating a lovely contrast with dense layers.
- Crushed candy canes: Deliver that iconic peppermint crunch and festive color.
- White chocolate pudding mix: Adds sweetness and a luscious finish that sets perfectly when chilled.
Make It Your Way
I love adapting this Candy Cane No-Bake Dessert Recipe slightly depending on the crowd or my pantry supplies. Little tweaks here and there make it really fun to experiment with, and you should definitely do the same!
- Variation: Try swapping Oreo cookies for chocolate graham crackers for a slightly different cookie base. I did this once for a non-chocolate fan and it still wowed everyone.
- More peppermint punch: If you’re a peppermint fanatic like me, add an extra ¼ cup of crushed candy canes to the topping — just be sure not to crush them too finely or it might get a little overpowering.
- Diet-friendly swap: Use low-fat cream cheese and sugar-free pudding mix if you want a lighter version, it still tastes indulgent but with fewer calories.
Step-by-Step: How I Make Candy Cane No-Bake Dessert Recipe
Step 1: Crafting the Perfect Crust
Start by pulsing those Oreos in a food processor until they turn into fine crumbs—this takes just a few seconds if you pulse carefully. Then, add the salt and melted butter, pulsing until everything holds together like damp sand. Press this mixture evenly into the bottom of your baking dish. I find using a flat-bottomed glass or measuring cup helps get an even, compact crust. Pop it into the fridge while you whip up the filling.
Step 2: Whipping Up the Cream Cheese Layer
Using an electric mixer, beat softened cream cheese until it's smooth and creamy. Add powdered sugar and milk, then mix again until silky—this usually takes about 2 minutes. Gently fold in one cup of whipped topping plus half of your crushed candy canes. This keeps the texture airy but still packed with festive peppermint flavor. Spread this mixture evenly over your chilled crust for the first delicious layer.
Step 3: Mixing the White Chocolate Pudding
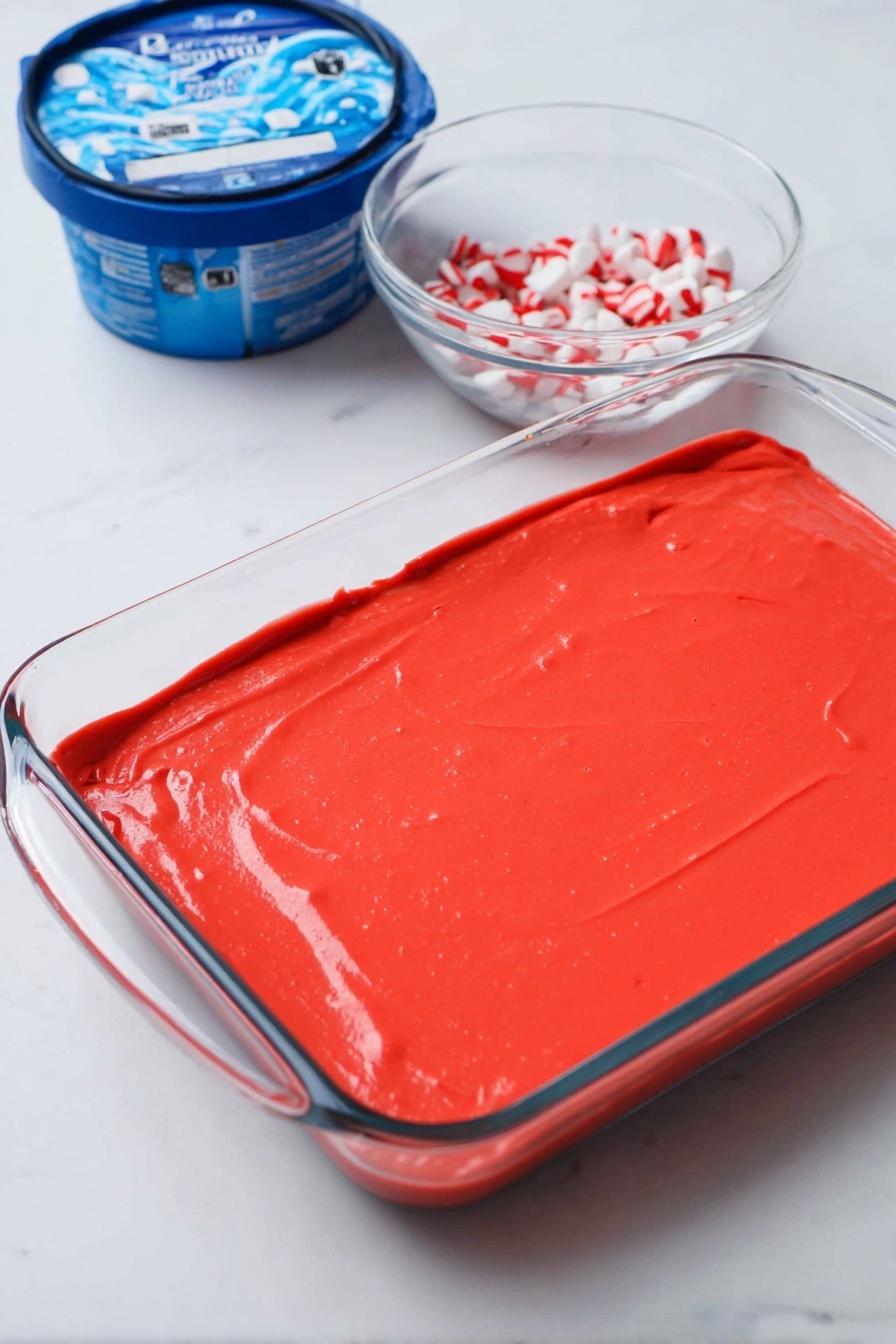
In a clean bowl, whisk together the white chocolate pudding mix and cold milk for about 2 minutes until it thickens beautifully. Spread this over your cream cheese layer—the contrast between the creamy pudding and tangy cream cheese is what really makes this dessert shine.
Step 4: The Fluffy Finishing Touch
Now spread the remaining whipped topping over the pudding layer like a fluffy snow blanket. Cover with plastic wrap or foil and chill in your fridge for at least 4 hours — or overnight if you can. The waiting is tough, but trust me, it’s worth it. When you're ready to serve, sprinkle the remaining crushed candy canes on top for that gorgeous peppermint sparkle and extra crunch.
Top Tip
From my many holiday dessert sessions, I’ve learned that the trickiest part is getting the layers to set just right and balancing the peppermint intensity. These tips smooth the process and boost your results.
- Use softened cream cheese: Ensure it’s room temperature before beating – this avoids lumps and makes for smoother filling.
- Don’t over-pulse cookies: Pulse just until fine crumbs form but don’t grind into powder to maintain a good crust texture.
- Chill properly: At least 4 hours is key — I’ve found overnight chilling makes the dessert slice beautifully and flavors meld perfectly.
- Crush candy canes carefully: Use a rolling pin for slightly larger chunks, adding great texture without being gritty.
How to Serve Candy Cane No-Bake Dessert Recipe
Garnishes
I like to finish the dessert with freshly crushed candy canes for that classic peppermint crunch and a little extra color pop. If you want to get fancy, a drizzle of melted white chocolate or a sprig of fresh mint also adds a lovely visual and flavor touch.
Side Dishes
This dessert pairs beautifully with a hot cup of peppermint tea or freshly brewed coffee. For festive events, I serve it alongside spiced nuts or even a simple fruit salad to balance the richness.
Creative Ways to Present
Once, for a holiday potluck, I made individual servings in clear mini mason jars. That way, each guest got a personal portion showcasing the beautiful layers—it was a huge hit and super cute! Try layering in trifle bowls or serving on colorful holiday plates to match your season’s vibe.
Make Ahead and Storage
Storing Leftovers
Leftovers should be covered tightly with plastic wrap or foil and stored in the refrigerator. This way, it stays fresh for up to 3 days. I find it tastes even better the next day as the flavors continue to meld, but don’t wait too long—those whipped toppings can start to weep.
Freezing
While I haven’t frozen this dessert often, I recommend freezing it only after baking steps 1–3. Freeze in an airtight container, then thaw in the fridge overnight before adding the whipped topping and final candy cane sprinkle. This keeps the texture intact better than freezing the whole layered dessert.
Reheating
This dessert is best served chilled, so reheating isn’t needed. If you find the whipped topping or cream cheese layers have firmed up too much in the fridge, just let the dessert sit at room temperature for 10–15 minutes before serving for the perfect softness.
Frequently Asked Questions:
Absolutely! While Oreo cookies give a chocolatey crunch, chocolate graham crackers or even crushed gingersnaps can work beautifully for a different flavor or texture.
Crushing your candy canes just before serving helps keep their crunch. Also, sprinkle them on right before serving rather than mixing all into toppings hours ahead. Clumping can happen if they sit too long in moist layers.
This recipe relies on cream cheese and whipped topping, but you can experiment with vegan cream cheese and coconut-based whipped toppings. Use dairy-free milk and pudding mixes made without dairy for similar results, although texture may vary.
You can assemble most of it up to the final whipped topping layer a day before serving. Add the topping and crushed candy canes fresh on serving day for the best texture and flavor.
Final Thoughts
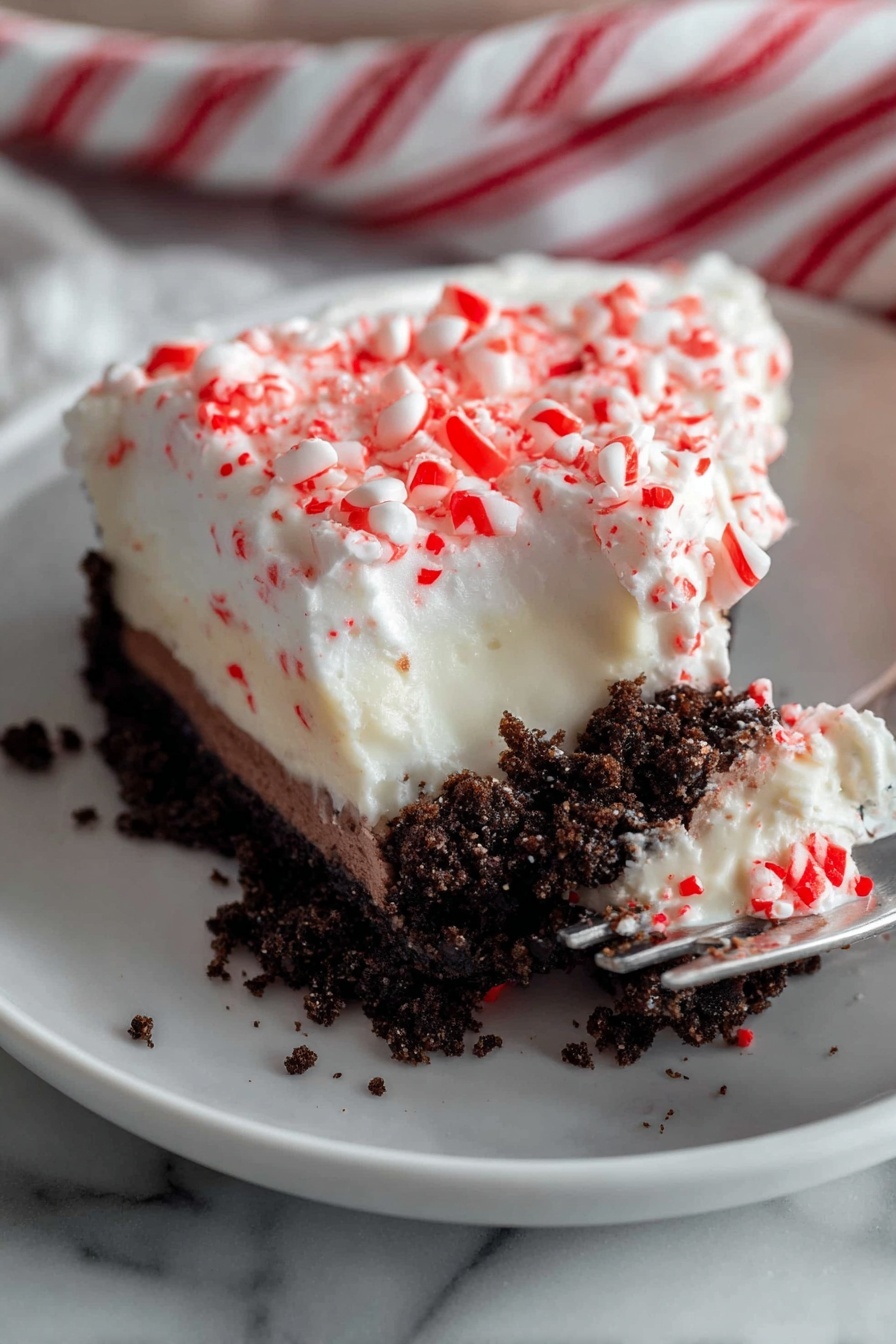
This Candy Cane No-Bake Dessert Recipe has become my go-to for holiday gatherings because it’s as joyful to make as it is to eat. It brings that perfect peppermint spark and creamy comfort that makes festive moments memorable. I hope you give it a try and have as much fun layering and sharing it as I do—just like chatting with a friend over a warm cup of cocoa.
Print
Candy Cane No-Bake Dessert Recipe
- Prep Time: 15 minutes
- Cook Time: 0 minutes
- Total Time: 4 hours 15 minutes
- Yield: 12 servings
- Category: Dessert
- Method: No-Cook
- Cuisine: American
Description
Candy Cane Lush is a festive no-bake dessert featuring layers of crushed Oreo cookie crust, creamy peppermint cream cheese filling, white chocolate pudding, and whipped topping, all topped with crushed candy canes for a delightful holiday treat.
Ingredients
Crust
- 36 Oreo cookies (a 14 oz package)
- ¼ cup unsalted butter, melted
- ¼ teaspoon salt
Filling
- 1 (8 oz) package cream cheese, softened
- ½ cup powdered sugar
- 2 tablespoons milk
- ¾ cup crushed candy canes, divided
- 1 (12 oz) carton whipped topping, thawed, divided
- 2 (3.3 oz each) packages white chocolate pudding mix
- 2 ¾ cups cold milk
Instructions
- Prepare the crust: In a food processor, pulse Oreo cookies into fine crumbs. Add salt and melted butter and pulse just until combined. Press the mixture firmly into the bottom of a 9x13-inch baking dish. Chill while preparing the filling.
- Make the cream cheese layer: In a medium bowl, beat the softened cream cheese with an electric mixer until smooth. Add powdered sugar and milk, and continue beating until the mixture is creamy and smooth, about 2 minutes.
- Combine cream cheese with whipped topping: Fold in 1 cup of the whipped topping along with ½ cup of the crushed candy canes. Spread this mixture evenly over the chilled crust.
- Prepare pudding layer: In a clean bowl, whisk together the white chocolate pudding mix and the cold milk for 2 minutes until the pudding thickens. Spread this over the cream cheese layer in the baking dish.
- Add final topping and chill: Spread the remaining whipped topping evenly over the pudding layer. Cover the dish tightly with plastic wrap or foil and chill in the refrigerator for at least 4 hours to set.
- Serve: Before serving, sprinkle the remaining crushed candy canes over the top for decoration and added peppermint flavor. Enjoy your festive Candy Cane Lush!
Notes
- This dessert is a no-bake treat perfect for holiday celebrations, featuring layers of white chocolate and peppermint.
- Ensure cream cheese is softened for a smoother filling consistency.
- Use cold milk when preparing pudding to achieve the best thickening effect.
- Chilling time is essential for the layers to set properly, so plan ahead.
- To vary texture, you can substitute crushed candy canes with peppermint baking chips.
Nutrition
- Serving Size: 1 serving
- Calories: 350 kcal
- Sugar: 30 g
- Sodium: 220 mg
- Fat: 20 g
- Saturated Fat: 12 g
- Unsaturated Fat: 7 g
- Trans Fat: 0.5 g
- Carbohydrates: 38 g
- Fiber: 1 g
- Protein: 4 g
- Cholesterol: 45 mg


Leave a Reply